Generating Certificates for Existing Completed Courses
If you already have users who have completed courses on your site, you may want to create certificates for them. If your site has less than 1000 users, the certificates for all past completed courses will be automatically created for your learners. If however, your site has more than 1000 users or the creation of the certificates fails, there is a way to rerun the creation of these certificates.
Navigate to Sensei > Updates in the WordPress admin panel where you will see a list of updates available to you for Sensei and for Sensei extensions. Simply click the Re-run Update button for the “Create Certificates” item. This will start the script to recreate the learners certificates.
Please note that a site with a large number of users will take an extended period of time to execute and complete.
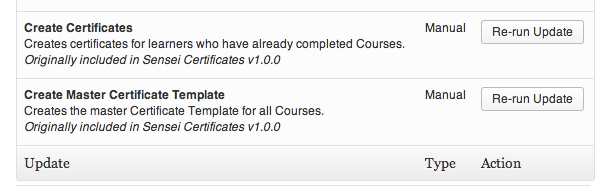
- Re-run the Certificate Creation function
Using the Default Certificate Template
Sensei Certificates comes with a default certificate template, allowing you to award users with certificates without having to design the certificates yourself.
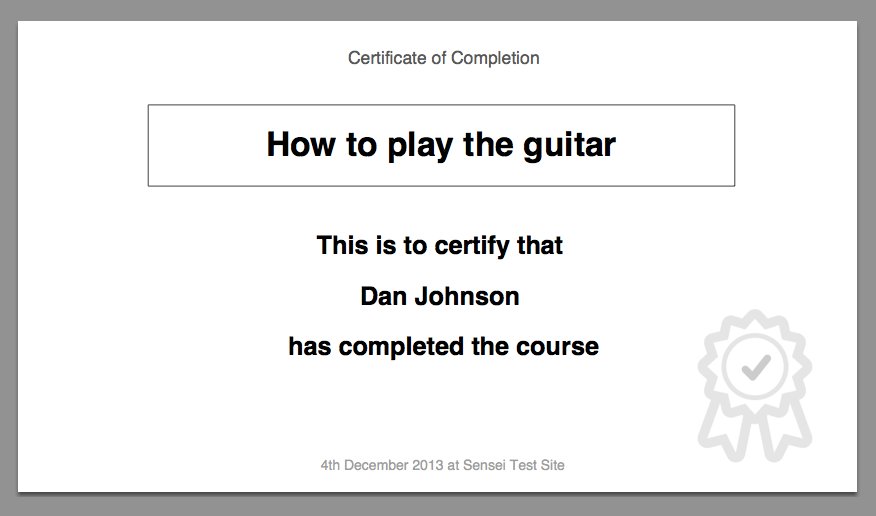
- The default certificate template
To use the default template, just edit the course(s) you want to use it for, and select Example Template from the Certificate Template select box, which you’ll find below the Course Categories panel.
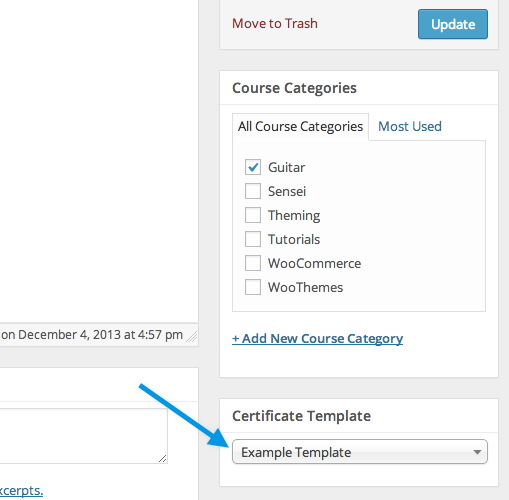
- Assigning the default certificate template to a course
If you change/delete the Example Template, and need to reinstall it, you can simply navigate to Sensei > Updates in the WordPress admin panel where you will see a list of updates available to you for Sensei and for Sensei extensions. Simply click the Re-run Update button for the “Create Master Certificate Template” item. This will start the script to recreate the example certificate template. Please note that when you run this function it will reset and assign the example certificate template to ALL courses.
Designing Your Own Certificates
Sensei Certificates comes with a default certificate design which you can use for any/all of your courses, but if you prefer, you can design your own certificates using the Certificate Template system.
To create a certificate template:
1. Go to Sensei > Certificate Templates.
2. Click Add New Certificate Template.
3. Give your template a name (this is for your reference only, and won’t be displayed on the front end of your site).
Upload a background image
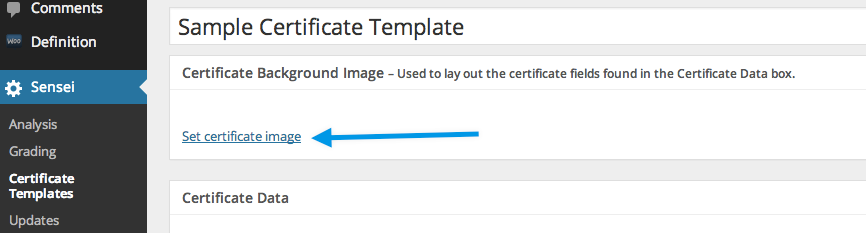
- Upload a background image for your certificate
4. Click Set Certificate Image and upload an image from your computer, which will serve as the background of your certificate. (A background image is required in order to create the PDF certificate.)
Image Guidelines:
- Supported image formats: PNG, JPG
- Recommended image resolution: 1200 x 675px – higher resolutions will work, but they will be scaled down and lose a lot of quality.
- Recommended image DPI: 72 – higher DPIs will work, but they will be scaled down and lose a lot of quality
Using these recommended image guidelines you will ensure the smallest file size while maintaining full image quality.
5. In the Certificate Data panel, set the default font options, which will apply to all the text on your certificate.
Position the text sections
The certificate template consists of 5 separate text sections:
- Heading – A heading for the certificate. e.g. Certificate of Completion
- Message – The message of certification. e.g. This is to certify that [learner name] has completed the course
- Course – The name of the course. e.g. How to Play Guitar
- Completion date – The date the course was completed. e.g. 4th December 2013
- Place – The name of the site issuing the certificate. e.g. Learn Guitar Online
6. For each text section that you want to display, you need to set the position that it will appear on the certificate:
Click Set Position. If the background image is not visible, the page will scroll up to the top of the image.

- Click ‘Set position’
Using your mouse/trackpad, drag out a box on the image where you want that text section to display.
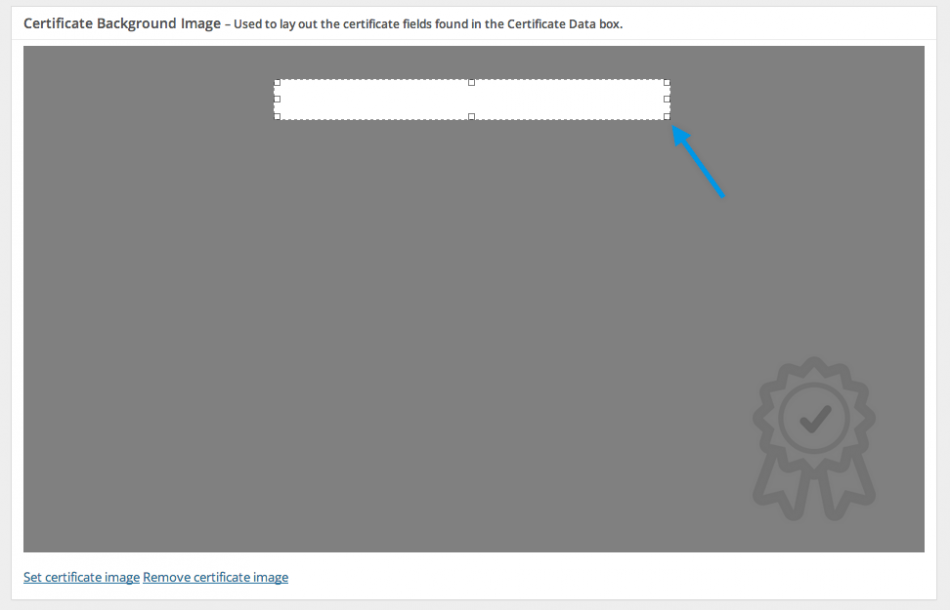
- Drag out a box to set the position of each section
You can reposition and resize the box within the image, and when you’re happy, scroll back down to the Certificate Data panel and click Done.

- Click ‘Done’ when you’re happy with the position
Repeat for all 5 text sections.
If you decide you don’t want to display any of the sections, you can click Remove Position, and that section will not be displayed on the certificate.
Adjust the font settings
7. You can optionally adjust the font settings for each individual text section. You can edit:
- Typeface
- Font size
- Text colour
- Make the text Bold/Italic
- Choose whether to center the text
- Choose whether to display a border around the text section (the border will be the same colour as the text).
Customize the text
8. Finally, you can customize the text that appears in each text section. You can add any plain text, and use any/all of the following placeholders, which will be replaced by the relevant user data:
- {{learner}} – The display name of the learner
- {{course_title}} – The title of the course that has been completed
- {{completion_date}} – The date the learner completed the course
- {{course_place}} – The name of the site, taken from the WordPress Settings
When you’ve finished customizing each section, your template page will look something like this:
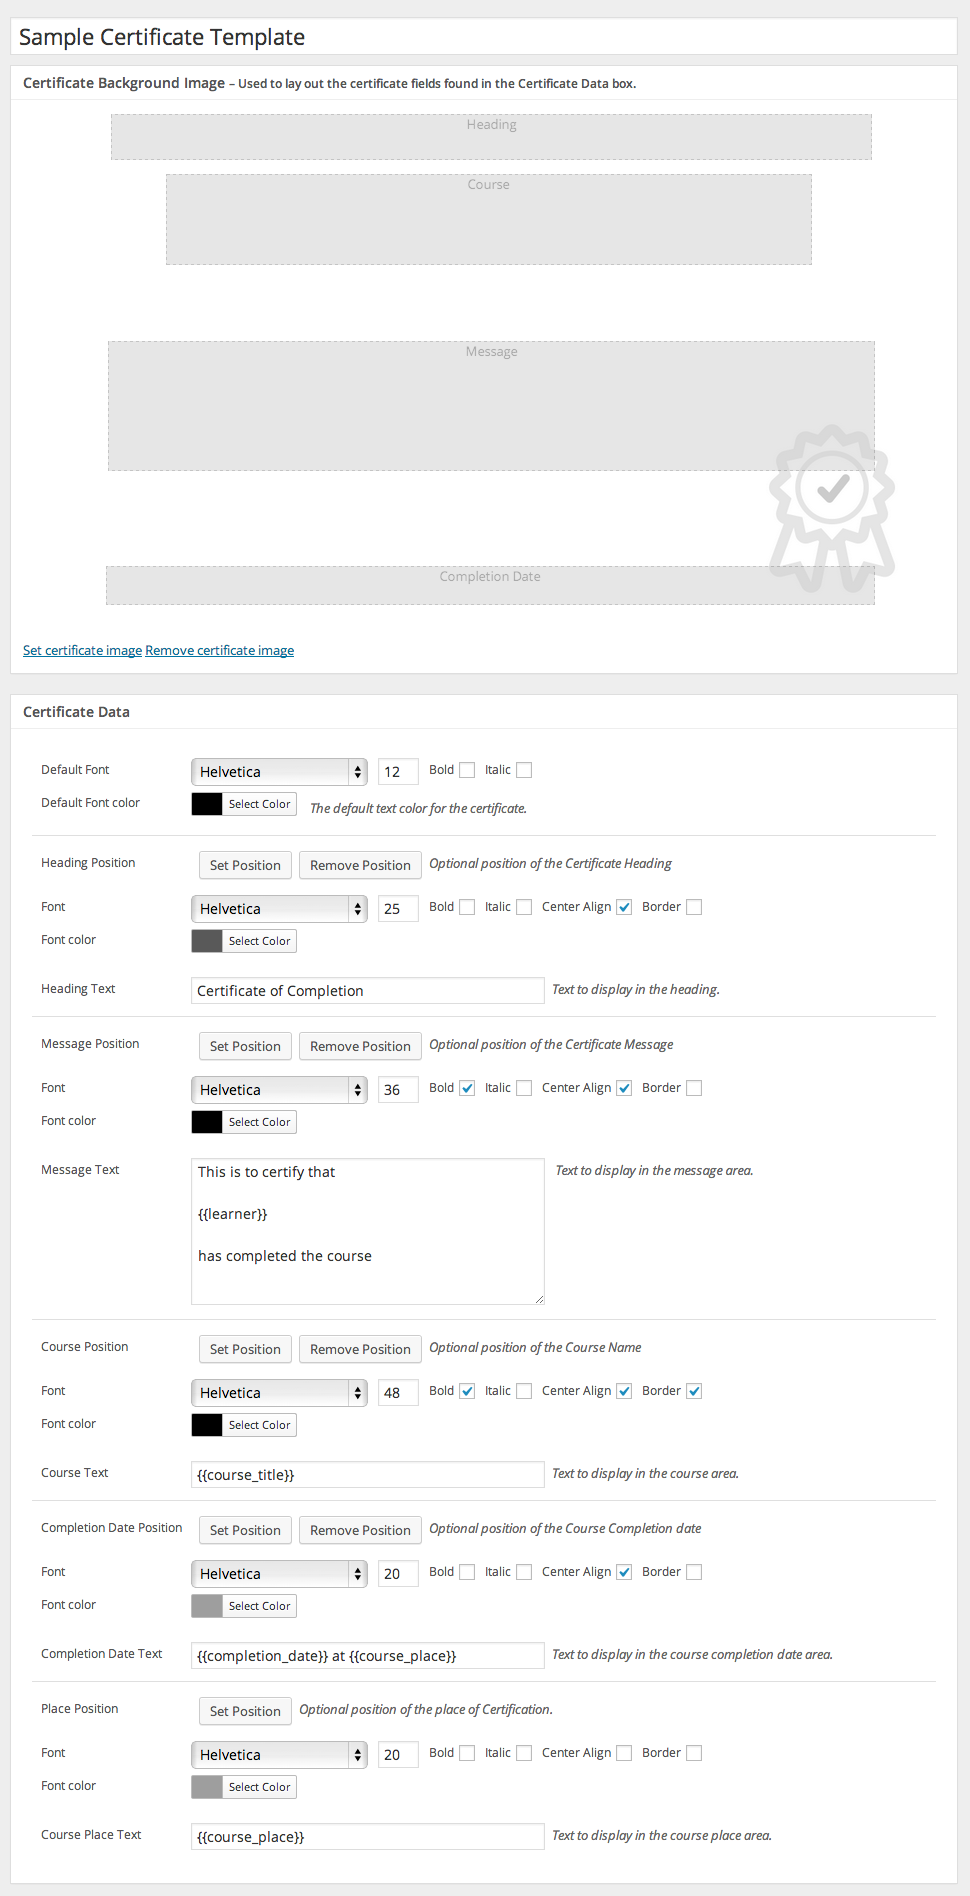
- An example of completed template settings.
9. Once you have at least saved a Draft of the template, click Preview to see an example of how your finished certificate will look, and make any changes if necessary.
10. Once you’re happy, click Publish to publish the certificate template.
This template will now be available in the Certificate Template field of your courses. You can see a list of all your certificate templates if you go to Sensei > Certificate Templates.
Changing the Date Format
If you need to change the format of the date, please refer to this guide.
*Article/link is in the process of being moved. Contact support for info in the meantime. Thanks!
How learners are awarded certificates
When a learner completes a course, they will be awarded a certificate. The learner can view the certificate by clicking the View Certificate link which appears on the single course page, the My Courses page (under completed courses), and the Learner Profile page, depending on the settings you select in Sensei > Settings > Certificate Settings (see below).

- The ‘View Certificate’ link on the My Courses page
The certificate is a PDF document, which will open in a new browser tab, where the learner can save it or print it, as they would any other PDF document.
As an administrator, you can view a list of all the certificates your learners have been awarded if you go to Certificates > Certificates.
Certificate Visibility
By default, certificates will only be viewable by the learner themselves (and the site administrator). If learners want to be able to share their certificates with the public, they can go to their learner profile page and enable the option for “Allow my Certificates to be publicly viewed”.
They can then share the certificate with anyone they like by sending them the certificate URL.
Certificate Settings
If you go to Sensei > Settings you will see a new Certificate Settings menu containing a few options for certificates.
- View in Courses – Choose whether to display a ‘View Certificate’ link on courses in the My Courses page and on single course pages.
- View in Learner Profile – Choose whether to display a ‘View Certificate’ link on courses in the Learner Profile page.

 English
 Português